Monday 31 August 2015

Design Wall Monday - August 31

Oh wow, it's the last day of August. Tomorrow I take son #2 back to university for another term.  And there are dead leaves scattered on my front lawn this morning. I think fall is definitely on its way.

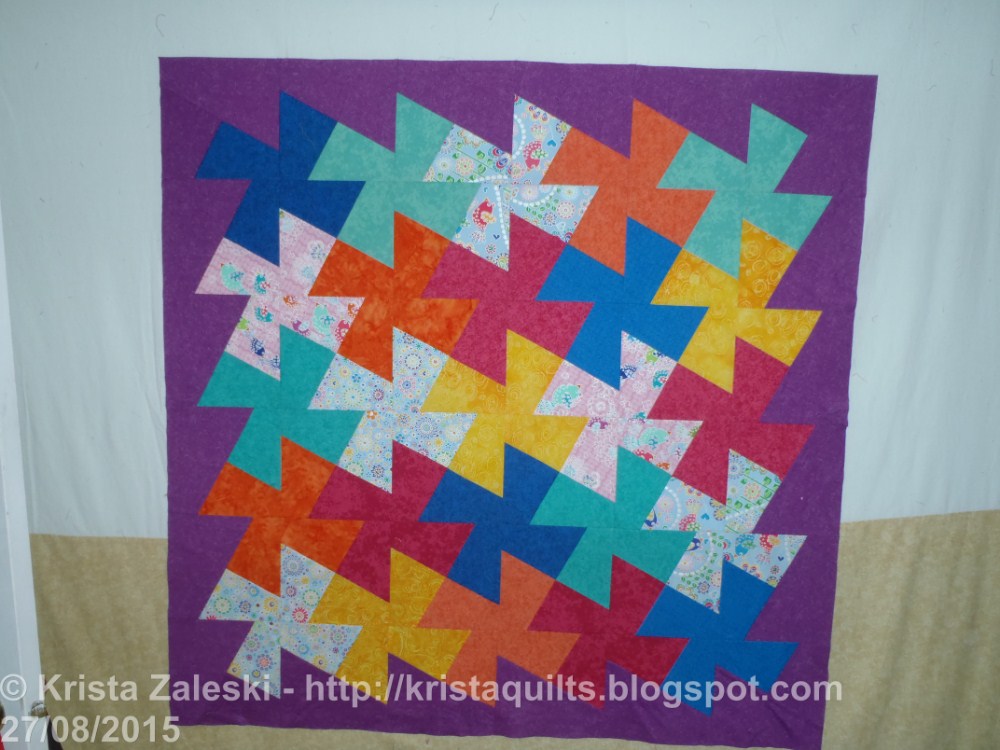
I've been a busy little beaver in my quilting room this week. No more finishes to claim, but I do have this top done. This is "Fox and Friends" and I'll be teaching a class on it later in September.

A new experiment has started.  This is supposed to be a city skyline, reflected in the water. What do you think?  It's not done yet - lots more rows to add, but I think the theory is going to work out.  I'm not sure yet if some sort of division between the buildings and the reflection is needed.


And of course I'm still working away on my leftover twister top, and making scrappy pineapple blocks. I have 17 now, which means I'm almost halfway to my goal of 35 blocks for that quilt.

Drop by Patchwork Times for more design walls today.


Sunday 30 August 2015

Stash Report

I missed last week's report, so I have a few little finishes to report.

I made 3 convergence tops - that used a total of 3 yards of fabric. And my double twister top used 4.5 yards.  Plus I have a backing for a quilt that I dropped on the longarm a week ago - 5 1/2 yards there. Nothing in this week, so my totals for the year continue to improve.

Stash totals for the year:
95 3/4 yards in
195 1/2 yards out
Total: 99 3/4 yards out
 
Drop by Patchwork Times for more stash reports today. 

Plus, I have a real live finish to show today!  I finally finished the binding on my Kaffe Fassett quilt.  Made mostly with shot cottons, although the background is a Peppered cotton instead.

Friday 28 August 2015

Oops

Oh no! I completely lost track of days this week, and forgot about Throwback Thursday :(  Never fear, I'll be back next week with a new (old) quilt.

Step 3 and done!

My new little twister quilt is now complete. The end result looks just like I hoped, although the process to get here wasn't quite as simple as I wanted it to be and the quilt is larger than I expected.

I started with 10 inch squares, and made a traditional twister top. After I finished step 2, and had a quilt top with the expected pinwheels, I wanted to twist the blocks one more time, to create the flower shapes. I saw this quilt in a book, but I was hoping that I could use the 2 sizes of twister rulers, rather than making the templates that the book called for.  Unfortunately, that was not to be. The size differential between the large and small twister is too big for the second cut to work out with the smaller ruler.

So instead, I decided what size I needed the twisted squares to be (6 1/4"), and created a template using one of my square rules. I carefully marked the twister lines using masking tape on that ruler and use those guides for cutting.  I had to do a little of bit of easing/stretching to make the seams line up for the little petals, but it was close enough that everything worked out and the quilt top lies flat.

As a bonus from this quilt, the second cutting step gave me 3.5" squares, already twisted.  So I'm putting these together into another top. It was a little bit small (18" square) so I took the leftover square from the first twister step and cut them to make a few more twisters for the bonus top.  This will be 21" x 24" when I'm done (I ran out of squares) and should make a good donation quiltie.


Thursday 27 August 2015

Step 2

Step 2 of my new project is now complete. Some might call this a finished top, but I'm trying something new with this one, so I have another set of cut & twist to go. 

First, I added an extra border, so that I won't be cutting off all the purple in the next step.  I think this quilt is going to finish larger than I expected (about 40x40), so I'm not sure where it's going to end up. Originally, it was to be a quiltie (24x24") donation.

I'm hoping to get this one done this week, but I just committed to make another quilt on a very short time schedule so this one might have to go on hold.


Tuesday 25 August 2015

Layer Cake Fun

I feel like I'm avoiding something. I have no idea what, but I've started about 4 different quilts in the past 2 weeks, and I don't really know why.  I showed two convergence quilts the other day, and then I made this one this weekend.

And when that was done, I did this. This is step 1 of a new project. I didn't actually make this from a layer cake, but I cut my own 10" squares from fat quarters. It's too bad that you only get 2 10" squares in a fat quarter. Lots of leftovers from that - but maybe they'll become part of a final border or the backing for this quilt.

I'm trying an experiment here, so I'll show steps 2 and 3 as they progress.

In the meantime, I'm still working on the scrappy pineapple quilt, using those blocks as leaders and enders for all these new projects.


Friday 21 August 2015

More Convergence

In cleaning up my scraps, and working on my scrappy pineapple, I decided to sort through my bucket of fat quarters.  I was feeling bored with making pineapple blocks and cutting scraps, so I thought I would try a quick convergence quilt. I made one years ago at a class (see yesterday's post), and I bought Ricky Timm's convergence book when he was in town in 2013.

I pawed through all my fat quarters, hoping to find a four-some which would work for this project.  Not a lot of luck there, but I did put together a couple of options.  I found 2 oriental fabrics that I've been trying to come up with a project for, and 2 matching fabrics in the fat quarter bin. Perfect!  But when I went to iron them and start cutting, I realized that the 2 matching fabrics were not full fat quarters. Rats!  Just one more reason to clean up my bins - apparently I dropped a number of fabric scraps in to the fat quarter bucket.

I thought I'd try it out anyway - how bad could it be? I simply sized the prints a bit wider, and matched them with the narrow pieces I had.  In retrospect it probably would have made more sense to simply make a smaller project, and cut all the fabric to the same size, but I went ahead with this plan.  It didn't quilt work out as I had hoped.  Seems that when you use odd sized pieces, you end up with the same fabric next to each other in some areas of the quilt.  

And then, I wanted the bird in the lower right to be comlete - which meant ensuring it was enclosed in a 5" square. That made for some non-standard cutting dimensions, and I see now that the second set of cuts were too uniform.

So this convergence isn't quite what I had envisioned - but it is a top, and used about 1 yard of fabric.  Now to figure out exactly how big it is, and add some borders to it.

And then, I was having so much fun I just kept going. I had a package of fat eights - hand dyed fabric from Vicki that I won a year or so ago.  I decided to play with it and try one of Ricky Timm's other convergence variations.   I should have planned the layout a bit more - instead I just made some free-form cuts to turn 4 fat eighths into a panel, and then converged it with another 4 eighths.  One last 8th (not sure why there were 9 in the set) plus a lucky find in my stash to create the two side borders, and voila!  I call this "Sunset".

I'm linking up with WIPs be Gone today.


Thursday 20 August 2015

TBT - Convergence

It's time for another edition of Throwback Thursday!  Please join me (see links at the bottom) and show off one of your earlier projects.

Once upon a time, I used to take classes at a local quilt store. A friend talked me into one, making a convergence quilt based on Ricky Timm's technique.  This was still early in my quilting days, when I bought fabric at Fabricland. I had a few rather poor choices in my "stash" in those days - purchases which were regretted as soon as I got them home.  One of them was this purple batik with flowers. I had it in both blue and purple. The blue was border fabric in Oh! My Stars, and the purple was part of the pieced border in that quilt. But I still had lots left and I wanted it gone.  So, for the Convergence class I pulled that fabric out, and found another purple batik in my stash which actually matched!

A half-yard of each of those fabrics went with me to class, and I carefully cut and sewed and cut and sewed some more, to make this quilt.  Convergence really is a simple project, and goes together really quickly.  And I could not believe the result when I was done. From 2 fabrics I disliked, I ended up with a really neat looking quilt.  I was totally thrilled.  The bright border is another batik which frames the center, and then I bordered it in the leftover purple. 

This was quilted on my domestic machine, with a stitch in the ditch along all the convergence seams.  Then some straight line quilting in the border to keep everything flat. It's about 36" square and was hanging in my quilting room until I reorganized.  I need to find a new wall for it.

I still have some fairly large pieces of this purple batik with flowers in my scrap bin (I think it's been removed from the stash and only scraps are left now).  Cutting scraps, it's been fun identifying what quilts some of the fabrics came from, and every time I see this one I think of the quilt I love,  made from ugly fabrics.

The rules are simple (and flexible :) ). Write a post (or revive an old one) about an old quilt or project that you have - maybe something from your pre-blogging days, or just a project you love that you want to show off again. Please include a link back to this post in yours, and when you link up make sure you are linking to your specific blog post, not just your blog address. You want to make sure people can find your post if they drop by the linkup later.

Add your link, and check out some of the other links for some inspiration. See my sidebar for a TBT button you can add to your blog.


Sunday 16 August 2015

Stash Report - August 16th

Can you believe it's already the middle of August?  Kids will be back to school soon, and fall will be here before we know it.

I keep forgetting to share this finish.  This is the companion quilt for my earlier baby boy quilt.  Oops, the picture didn't rotate today. I wish I knew the magic incantation to figure out whether or not it would.  This quilt is a growth chart and baby book panel - an odd choice for a quilt, but tall panels are not popular for donations.  Hopefully someone will like this - it has a nice soft flannel backing..

I've also managed a few more blocks for my scrappy pineapple. Slowly but surely, this is coming together.  I'm sure we'll all be sick of seeing this on my design wall, by the time it's a full quilt :)

On the stash side, I managed to stay out of quilt stores this week, so I have nothing out and nothing in to report.

Stash totals for the year:
95 3/4 yards in
185 1/2 yards out
Total: 89 3/4 yards out
 
Drop by Patchwork Times for more stash reports today. 

Thursday 13 August 2015

TBT - Scrappy Trails

This quilt was my first scrappy quilt. It was a mystery as part of a local quilt guild, back in 2005, just after I started quilting.  The pattern was a mystery quilt created by Judy Hopkins, named "Scrappy Trails to You".

Even then I knew that scrappy was a challenge for me, so I stuck with very similar tones in each of the two colourways that were used in the quilt.  And since I was still a very new quilter, I did not actually have many scraps, so all of this fabric was bought specifically for this project. The pattern is relatively simple, being all composed of squares and half-square triangles.


I quilted this on my domestic machine, way back then.  It's a cross-hatch pattern, running through the center of all the blocks.  And the binding is scrappy, using some of the leftovers from the fat quarters which were used for the quilt center.  An interesting choice for me, since I tend to bind my quilts in the border fabric rather than something that stands out like this.

I have to assume this quilt was donated. I do not have it any longer, and I know it wasn't a gift to any of my family.  But looking at the pattern, I am tempted to make a new one with the same pattern. I'd have to reverse engineer it, but as I said it does not seem to be very difficult.  Mostly it would be the placement of colours that requires the most planning and though.

I still have many of these fabrics in my scrap bins. I know that because I recognize a number of them from my scrap cutting efforts of the past week.

Please join me for Throwback Thursday fun. I love seeing all your Throwback projects. So many lovely memories in all those early quilts.

The rules are simple (and flexible :) ). Write a post (or revive an old one) about an old quilt or project that you have - maybe something from your pre-blogging days, or just a project you love that you want to show off again.  Please include a link back to this post in yours, and when you link up make sure you are linking to your specific blog post, not just your blog address.  You want to make sure people can find your post if they drop by the linkup later.

Add your link, and check out some of the other links for some inspiration.  See my sidebar for a TBT button you can add to your blog.

Tuesday 11 August 2015

Confessions of a scrap hoarder

I have never been a fan of the various scrap management systems that you see out there.  I always thought it was wasteful to cut my scraps into predetermined sizes - because what if I cut 3", and I pick at a pattern than needs 4" blocks.  Or 2" - those I could cut down from the 3" blocks, but then there'd be that 1" waste.  It just seemed more conservative to keep the scraps whatever size they end up, and wait to cut them until I need them.  So every time I made a quilt, all the bits smaller than about 6 inches got mushed up and crammed into one of my scrap bins.

Then, I started making my scrappy pineapple. And I was digging my way through all my scrap bins, trying to figure out what I have, which pieces are big enough to bother using, and having to iron and cut all of them to prep for my blocks.  What a pain. And what a mess, as I dug through all those bins.

What I realized earlier last week is that I may be saving some fabric by not cutting my scraps, but in fact I don't know what I'm saving it for because I never make scrap quilts. And the reason is not so much that I don't like them, or don't want to make them. It's because I dread trying to dig through all my bins, pulling out scraps, ironing, and then finding out that I don't have enough of the colour I need anyway. So it's much easier to just grab a bunch of fat quarters (or buy more) to fill the 'scrappy' requirements.

So, as I was sorting through to find bits for my pineapples, I decided that I needed to sort things out.  I figured 2.5" strips is the most common size I use. And if I buy myself an "easy angle" ruler, I can use 2.5" strips for half-square triangles too, so they become even more useful.

Based on that logic, I then decided that 5" strips make sense. They are big enough that I can later cut them down for 4" or 3" or whatever I need. Or cut in half for two 2.5" strips.   So, I decided to cut my scraps into those 2 sizes.

And then, I realized that I'm left with a lot of still rather large pieces - so I cut 2" strips where I could. And the final step was 1.5" squares. I have a bin of these already, for a vaguely planned watercolour quilt - so anything without a larger use was going to get cut down to this size for that future plan.

I briefly considered 1" strips, for a (dream) of an ohmigosh quilt one day, but that's mostly a pipe dream, so I decided not to deal with those tiny little bits at this point.

At this point, I have cleaned out 4 drawers of crammed in scraps, and reduced them to these 3 tidy drawers of strips, plus my 1.5" bin of squares (which is now full, and will have to be relocated).  Lots of room left in these bins, now that the fabric is all cut and folded neatly in strips.  And lots more scraps to tackle. So far I've done my blue, brown, orange and some purple scraps. But I have big rubbermaid containers and at least 3 bags of more colours waiting for my attention.

I think I'm going to be happy with the end result - I guess the truth will be in whether I make a scrappy quilt in the near future :)

Monday 10 August 2015

Design Wall Monday - Aug 10

Once again, there isn't much change on my design wall this week. I had hoped to finish another 3 blocks, but they are only 1/2 done right now.  So, I'm still sitting at 9 blocks for my scrappy pineapple.

Here's what I've been spending this weekend working on.  Hundreds of clamshells, filling the background of a king-sized quilt.  I'm having so much fun with this, and loving the result.  Now to figure out which of my own quilts needs this treatment :)

For more design walls today, drop by Judy's blog.


Sunday 9 August 2015

Stash Report - Aug 9

I went to a quilt show on Friday, and I caved.  Some pretty fabrics came home with me.  First stop, I picked up this gorgeous city scape, and some coordinating fabrics. No idea what it will become, but I love this panel.

And then I picked up the Northcott Starry Night panels from both this year (reindeer) and last year (wreath) to go with my recently finished Christmas tree panel.  Plus of course some coordinating fabrics, since I used all mine for the tree.

Total yardage in this week - 6 1/2 yards.  And nothing out, as I've been working on the longarm, rather than my quilts this week.

Stash totals for the year:
102 1/4 yards in
185 1/2 yards out
Total: 83 1/4 yards out

Drop by Judy's blog for more stash reports today.

Thursday 6 August 2015

TBT - Pinwheel Chain

Another quilt from my pre-blogging days. After I finished my Irish Chain for my eldest, I of course needed to make a quilt for my youngest son.  I wanted something a little bit different, but since I was still a new quilter, I didn't want to pick anything too complicated. I decided on this pattern of pinwheels joined by a simple chain.

After quilting the first twin size quilt, I thought I'd experiment with quilt-as-you-go this time.  It was a lot of work manipulating that big quilt through my machine, and I thought this might be easier. But I didn't want the traditional 1/2" sashing between each block that you often get with quilt as you go.  I also didn't want the quilting to follow the blocks - I wanted, as I had done with the last one, to be able to quilt a design of some sort in the negative space between the chains.  But that doesn't line up with where the blocks ended, so I would have to do something different.

I read somewhere about doing quilt as you go with quilted sashing strips, rather than the 1/2" binding type joints, so I thought i would try that out.  In order to deal with that, I decided to make the backing pieced, in a patttern that would map nicely to the front. This would allow me to piece the front and back in rows, and quilt each row (or portions of rows) as I went along.

I designed the top as X-blocks with sashing strips and pinwheel corner stones, so the backing needed to have the same layout.  My son was really into rainbows, so I decided to make the back a scrappy rainbow for him.  Large hourglass blocks, 1/2 square triangles for the corner stones, and sashing strips made everything line up.  The biggest challenge was working in my (very small 6'x10') sewing room and keeping everything organized so it all went together in the right order.  I pieced a row + sash of the top, made the matching row + sashing of the back, layered it and quilted those sections. Then, pieced the next row, sewed the row to the previous sashing (both front and back), added batting and quilted that section. Always staying a couple of inches away from the raw edge, so that I could attach the next row.

The end result was a quilt I love - and he loved to pieces, literally.  Unfortunately, the cheap fabric purchased back in my early days did not stand up to the daily use and regular washings that this quilt endured.  The top was all high-quality fabric from a quilt shop, but many of the backing fabrics were early purchases. These have now started to shred.  I made an attempt to repair this quilt for my son by adding a new layer for the backing, but realized when I started how many seams on top were separating. So unfortunately I abandoned that plan.  I may try again - some dense quilting should hold the top together with a new backing.  It's very sad to see a quilt falling apart, but it is good to know it was well loved.  And never fear - my son does have a new quilt now.

Please join me for Throwback Thursday fun. The rules are simple (and flexible :) ). Write a post (or revive an old one) about an old quilt or project that you have - maybe something from your pre-blogging days, or just a project you love that you want to show off again.  Please include a link back to this post in yours, and when you link up make sure you are linking to your specific blog post, not just your blog address.  You want to make sure people can find your post if they drop by the linkup later.

Add your link, and check out some of the other links for some inspiration.  See my sidebar for a TBT button you can add to your blog.


Monday 3 August 2015

Design Wall Monday

Not much happened in my sewing room this week, although I did manage to get a few more pineapple blocks made this weekend.  Other than that, my time has been spent working on customer quilts.

Looking at some pictures of pineapple blocks, I kind of wish the template I am using (Creative Grids Pineapple Ruler) made one more round. These blocks are 10.5" unfinished, I'm thinking 12.5" might be more pleasing, and have a little bit more of the pineapple curve to them.  Maybe I'll consider that for the next one - I really don't want to unsew all those corner triangles at this point.

This week's plan is to get a few more customer quilts done - I need to finish up some smaller projects, so I can put the giant custom job on the frame this week.  And make some more pineapple blocks in my down time.  And find the table in my sewing room :(  It is a complete disaster in there, with fabric strewn everywhere, and not just the fabric for this pineapple quilt.

Drop by Judy's blog to see what everyone else has on their design walls today.

Sunday 2 August 2015

Stash Report - Aug 2

I have just a little bit of fabric out this week, but the overall achievement is 4 finishes this week!  I showed 3 of them on Friday, after a binding blitz.  The 4th is a Christmas tree panel that I've had since 2013.  Finally done - at least done to the point I could hang it.  Still trying to decide if it needs some additional embellishment - I bought some thread for bobbin work that I thought might work for tinsel, although it might be too white, rather than silver.  And I haven't decided if I'll add the lights or not. I think the answer is probably yes, but that might depend on the result with the thread.


Stash used this week
Bindings for 3 quilts (see Friday) - 1 yard
Christmas tree binding -  1/2 yard

Nothing in (yet).  This year, Northcott brought out a reindeer, and I've seen it in blue, so I suspect it will be be coming home soon. I wish I could find the wreath from last year, in blue. Maybe a web search is in order.

Stash totals for the year:
95 3/4 yards in
185 1/2 yards out
Total: 89 3/4 yards out
 
Drop by Patchwork Times for more stash reports today.