 Another quilt from my pre-blogging days. After I finished my Irish Chain for my eldest, I of course needed to make a quilt for my youngest son. I wanted something a little bit different, but since I was still a new quilter, I didn't want to pick anything too complicated. I decided on this pattern of pinwheels joined by a simple chain.
After quilting the first twin size quilt, I thought I'd experiment with quilt-as-you-go this time. It was a lot of work manipulating that big quilt through my machine, and I thought this might be easier. But I didn't want the traditional 1/2" sashing between each block that you often get with quilt as you go. I also didn't want the quilting to follow the blocks - I wanted, as I had done with the last one, to be able to quilt a design of some sort in the negative space between the chains. But that doesn't line up with where the blocks ended, so I would have to do something different.
I read somewhere about doing quilt as you go with quilted sashing strips, rather than the 1/2" binding type joints, so I thought i would try that out. In order to deal with that, I decided to make the backing pieced, in a patttern that would map nicely to the front. This would allow me to piece the front and back in rows, and quilt each row (or portions of rows) as I went along.
I designed the top as X-blocks with sashing strips and pinwheel corner stones, so the backing needed to have the same layout. My son was really into rainbows, so I decided to make the back a scrappy rainbow for him. Large hourglass blocks, 1/2 square triangles for the corner stones, and sashing strips made everything line up. The biggest challenge was working in my (very small 6'x10') sewing room and keeping everything organized so it all went together in the right order. I pieced a row + sash of the top, made the matching row + sashing of the back, layered it and quilted those sections. Then, pieced the next row, sewed the row to the previous sashing (both front and back), added batting and quilted that section. Always staying a couple of inches away from the raw edge, so that I could attach the next row.
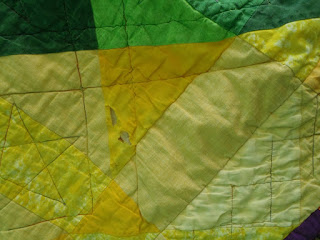
 The end result was a quilt I love - and he loved to pieces, literally. Unfortunately, the cheap fabric purchased back in my early days did not stand up to the daily use and regular washings that this quilt endured. The top was all high-quality fabric from a quilt shop, but many of the backing fabrics were early purchases. These have now started to shred. I made an attempt to repair this quilt for my son by adding a new layer for the backing, but realized when I started how many seams on top were separating. So unfortunately I abandoned that plan. I may try again - some dense quilting should hold the top together with a new backing. It's very sad to see a quilt falling apart, but it is good to know it was well loved. And never fear - my son does have a new quilt now.
Please join me for Throwback Thursday fun. The rules are simple (and flexible :) ). Write a post (or revive an old one) about an old quilt or project that you have - maybe something from your pre-blogging days, or just a project you love that you want to show off again. Please include a link back to this post in yours, and when you link up make sure you are linking to your specific blog post, not just your blog address. You want to make sure people can find your post if they drop by the linkup later.
Add your link, and check out some of the other links for some inspiration. See my sidebar for a TBT button you can add to your blog.

Hi Krista! I had no idea there was another Throwback Thursday going on! Great minds think alike!
ReplyDeleteGreat looking quilt, both the front and the back. I never would have figured out how to do that QAYG when I was a beginning Quilter.
ReplyDelete