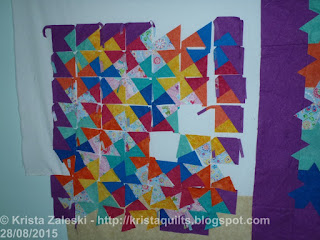
 My new little twister quilt is now complete. The end result looks just like I hoped, although the process to get here wasn't quite as simple as I wanted it to be and the quilt is larger than I expected.
I started with 10 inch squares, and made a traditional twister top. After I finished step 2, and had a quilt top with the expected pinwheels, I wanted to twist the blocks one more time, to create the flower shapes. I saw this quilt in a book, but I was hoping that I could use the 2 sizes of twister rulers, rather than making the templates that the book called for. Unfortunately, that was not to be. The size differential between the large and small twister is too big for the second cut to work out with the smaller ruler.
So instead, I decided what size I needed the twisted squares to be (6 1/4"), and created a template using one of my square rules. I carefully marked the twister lines using masking tape on that ruler and use those guides for cutting. I had to do a little of bit of easing/stretching to make the seams line up for the little petals, but it was close enough that everything worked out and the quilt top lies flat.
 As a bonus from this quilt, the second cutting step gave me 3.5" squares, already twisted. So I'm putting these together into another top. It was a little bit small (18" square) so I took the leftover square from the first twister step and cut them to make a few more twisters for the bonus top. This will be 21" x 24" when I'm done (I ran out of squares) and should make a good donation quiltie.
I love this idea of double-twisted and might have to try it (I own both of the twister templates and haven't yet used either one ... )
ReplyDeleteOver my head! It was all I could do to manage the first step in my Twister. Love the tesselating flowers and proud of you for using the leftovers.
ReplyDelete