Sunday 30 August 2009

Design Wall Monday - Aug 31


I have my design wall back this week. Didn't waste any time filling it up, either. My tumbling block is on the wall - and I'm debating whether it is already big enough, and I don't really have to make 160 blocks for it.

I picked up a dark background fabric, which I like the look of much better than the white background. If I keep the really dark squares from being adjacent to the black, I think it will work out.

Still playing with the exact placement of the falling blocks. And debating whether I can piece the lower right side, or if I have to resort to applique.

This will stew for a few more days - I have to finish the quilt sandwich I'm currently working on, so that I can put my room back into the right orientation for piecing. That should give me time to settle on the layout.

See what's on everyone else's design wall over at Judy's.

Friday 28 August 2009

Stash Report - Aug 30

I managed to get a lot of quilting done this week, despite no access to my sewing room and usual machine. Being on vacation was great! I didn't finish any quilts, since I won't do quilting on my old machine, but a lot of progress was made on my tumbling blocks, and I did finish the top of the mystery quilt.

Used:
.25 yard - tumbling blocks
2.25 yard - cut out fabric for kaleidoscope blocks
1.5 yard - border for mystery quilt

Bought:
I broke down. My fabric store had a 40% off sale, and they had a gorgeous colour that I fell in love with. It was calling to me. And of course it had to bring some friends home too ;) I'm hoping to turn this bundle into a bargello quilt - once I finish a few current projects.
5 yards in

Used YTD: 21 yards
Added YTD: 15 yards
Net: 6 yards out this year

Check out Judy's blog to see what other quilters have been up to.

Finishing Friday - Aug 28


Even with my sewing room out of commission, I was able to make some progress on my projects this week. I setup my machine in my bedroom, and did a lot of piecing (with 3 boys in the house, retreating to my bedroom on occasion was a dream.) One quilt done, one completely pieced, and great progress on another. And my favourite finish of the week - my Lone Star is done, and on my bed. Finished turning the binding this week.

Maybe I should have visitors and give up my sewing room more often. Or not. I can't wait to have my room back, so I can start quilting the 4 tops that are sitting on my self.

I have: (the * indicates I made progress this week, but it's not done yet)
DONE - A quilty for the children's hospital
- the shop hop quilt (ready for quilting now)
DONE - queen-size lone star
- A challenge quilt from my local quilt shop - 3 years ago (needs quilting)
- a picture quilt from my 2005 trip to Mexico (needs quilting)
- a queen size quilt (need to quilt it)
- a set of 3 wall quilts (to be hung)
- a stained glass dragon (still piecing)
- a Hawaiian wall-quilt that's been on my frame for 4 years now (finish quilting)
* - mystery quilt (ready for quilting)
* - tumbling blocks
- reversible quilt

Want to share your finishes for this week? Add your link below, or post a comment.

Thursday 27 August 2009

160 ?!?

I just calculated the size of the tumbling block quilt I started this month. It began as an experiment and a way to use up some of my scraps. I picked the block size pretty much randomly, and figured I'd let the blocks define the size of the quilt. Well, now that I have a few more blocks done, I laid a few out and did a quick calculation. Approximately 160 blocks to make a 30" x 40" quilt. Less a few, since one corner will be 'fractured'. But still. Sure am glad I didn't pick 1 or 1.5 inches for the diamonds.


160 - that's way more little blocks than I was expecting to make. This may require a bit more patience than I expected. I have 43 blocks complete. Another 15-20 cut out and ready to piece. That doesn't even get me half-way, and I've pretty much exhausted all the obvious colour triples in my stash. I guess I'll have to dig a little deeper next week.

To get a break from diamonds and Y-seams, I started planning my next quilt :) In my own defense, it will be (mostly) a stash quilt. In fact, it will be one that I started planning about 4 years ago - I'll finally cut into the fabric I bought for a kaleidoscope quilt.

Wednesday 26 August 2009

Too white, or not too white?

I spent most of yesterday far away from my sewing room. Took my kids and my nephew to an amusement park. It was a fun day, and I managed to get my annual roller coaster fix while we were there. I love roller coasters. I wish someone would build one closer to home, however. Overall a fun day, but six hours of driving makes for a very long one.

Slept in this morning, and got up refreshed and ready to go. I put the final borders on the mystery quilt I was working on. All done now, and ready for quilting.

The white border is giving me some trouble though. I wish I'd had enough of the green fabric to do a wide border with it, but all I had was enough for the narrow border. It might grow on me - looking at the quilt in negative I realy like it, so I think (hope) picking the star colour for the border was a reasonable choice.

What do you think? Keep the white, or try to find a complimentary dark green and re-do the border?

Monday 24 August 2009

Design Wall Monday - Aug 24


My design wall is completely empty today, because I had to clear it out of the sewing room before my nephew arrived. However, I did take a picture of my current quilt, before I took it down. So this is what part of my design wall held last Friday. The tumbling blocks and reversible quilt are still there, too.

I'm almost done the star quilt - this is half of the quilt on the design wall. The basic quilt block is a 24" section with 5 stars. I decided I didn't want a square quilt, and wanted something slightly larger (but not as large as a twin necessarily - besides, I don't have enough fabric for that). So I designed a sashing strip one star wide to go between the blocks. I'll have to re-work that a bit I think, to make 3 stars across rather than 2. Otherwise I'm going to have an odd empty space in the center of the quilt.

Check out what other quilter's have on their design wall this week. over at Judy's blog.

Sunday 23 August 2009

Ready for visitors

I did it! My sewing room is all cleaned up, in plenty of time for my nephew's arrival today. Works in progress all bagged, folded, and put away. I'd say neatly, but that's a bit of a lie. My nephew will be under instructions to keep the closet door *closed*. Wouldn't want something to fall on him :)

All the leftover bits & scraps of fabric are stored (stuffed) into the appropriate bin. Found the binding strips for a couple of quilts. That's good news - I would have hunted all over for those when I got to those particular projects if I hadn't cleaned first.

I even packed up my sewing machine and took it into the shop for a little TLC. I don't think the poor thing has been serviced since before I moved 3.5 years ago. Since I can't get at it's table for the next week, it seemed like a perfect opportunity to treat it to a tune-up.

And the best news - I dug out my old sewing machine, and set it up on a table in my bedroom. Now I can still sew for the next week (assuming I can steal a few minutes from the kids) and I don't have to go into withdrawl. It runs like a dream - I wonder why I every replaced it?

First thing I did was finish the sewing machine cover I started on for it, 4 years ago. That was another surprise find, bundled up beside the machine. It's bit wrinkled and dusty, so I'll throw it in the wash today. But now I've finished another UFO - and one that I'd complete forgotten about :)

Friday 21 August 2009

Surprises

It's amazing what surprises you find when cleaning up unfinished projects. The start of my "finishing kick" was finding 5 quilts in a drawer in the living room, where I had put them. I brought them downstairs some time ago so that I could do the handwork (binding, etc.) while watching TV.

When I found them earlier this month, I thought they had been there for a few months - maybe 6 at the outside. However, I pulled the last one out last night to start the binding. As it unfolded, out fell the label I had made when I finished quilting it. March 2008. Yes, 2008. These quilts have been sitting in my drawer for 18 months, not 6. I guess I need to make a new label - because I no longer belong to the quilt guild that it was going to be donated through, either.

On the bright side - I am now finished another quilt, and all 5 of the UFOs hiding in my drawer are now complete. I'll hang 3 of them this week, give the latest to the children's hospital, and the other is already in use by the kitties.

It doesn't show up well in this picture, but this is more of the cat fabric from my last quilt. I'm not very good at matching colours, and used the grey in a attempt to match some of the kittens. I wish I'd been more adventurous, and picked a colour that complemented the fabric, rather than tried to match it. For example, the background fabric (navy blue with gold stars) would, I think, have been a much more interesting choice for front of the quilt. Live and learn, and maybe gain some colour-sense as I go along.

There is one problem with working on unfinished quilts all week. Not a single stitch of stash fabric was used. Nothing was bought either, so at least it's a break-even week on that front. Check out Judy's blog for more stash reports from other quilters this week.

Finishing Friday - Aug 21

So, how did your week go? Did you get a quilt finished?

I didn't get as far as I had hoped. But I did get one quilt done, which is definitely progress. I also made a lot of progress on 2 other quilts. My Lone Star is now almost done quilting, and will hopefully finish and get binding attached today. And I finished the shop hop quilt, and it's now ready for quilting. It'll be done and sent to thequilt.com by October I hope.

And I made a lot of progress on the mystery quilt I started last week. Would have finished more, but I put one section together completely backwards, and had to undo all those blocks. Sigh.

Sewing room gets packed up tomorrow, to make room for my nephew to visit. So the only sewing likely to happen is finishing bindings (hand sewing) if the kids give me some free time to do that.

My list hasn't changed much over the week, but here it is:

I have:
DONE - A challenge quilt from my local quilt shop - 2 years ago (needs binding)
- A quilty for the children's hospital (needs binding)
- the shop hop quilt (ready for quilting now)
- queen-size lone star (needs quilting)
- A challenge quilt from my local quilt shop - 3 years ago (needs quilting)
- a picture quilt from my 2005 trip to Mexico (needs quilting)
- a queen size quilt (need to buy backing and quilt it)
- a set of 3 wall quilts (to be hung)
- a stained glass dragon (still piecing)
- a Hawaiian wall-quilt that's been on my frame for 4 years now (finish quilting)
- mystery quilt


Tell me what you're working on. Add a link to your UFO list below, or post a comment.

Wednesday 19 August 2009

Cats!

It's good to know that my cats appreciate my quilting efforts. Caramel, however, needs to learn that the reason I put a quilt on the couch is to keep her cat fur off the furniture. Hence, she should be sitting on top of the quilt, not curling up underneath it. She does look very good in those colours, however.

The good news is, if she is curled up under this quilt, she's not on top of the one that is currently under the machine upstairs. Quilting on the lone star is progressing steadily. There is hope that I can finish it before I have to pack up my sewing room for a week. But only if I find more quilting time than I got tonight. Only 1/2 hour of work on the quilt, between working late, and dancing.

Monday 17 August 2009

Design Wall Monday - Aug 17

Here's what's on my design wall today. On the left is a tumbling block quilt. I initially thought I'd do it on a dark background, but having auditioned some of the blocks against it, that obviously doesn't work. It will probably end up on white instead.

The lower right is going to be a reversible "quilt as you go" baby quilt. I'm using the squares to test out some quilting patterns before tackling them in large scale. Seems to be working - I definitely figured out what NOT to do on my Lone Star quilt.

Upper right is a mystery quilt I just started on Saturday. Didn't last too long with "not starting any new projects" did I? I stumbled across the mystery accidentally on Saturday, and when I discovered it was happening that day - and that I had enough fabric in my stash to do it - I couldn't resist. Not sure what's going to done with those 2 blocks - I'm a bit behind, only on clue #3, but I'm resisiting peeking at the end. And I'm not sure where this quilt is going in the end. I originally thought my son might like it (we just painted his room green), but now that I've cut some blocks, I see that the fabric has too much pink in it for him.

Check out what's on everyone else's design wall over at Judy's blog.

Sunday 16 August 2009

UFO Update

One UFO is now officially off the list. I finished the binding on my cat quilt. This was a challenge quilt from my local quilt shop in 2007. Given very general instructions each month, the variety in the end products was amazing. Instructions like "applique something", or "make some flying geese". The individual steps were generally simple to do. The challenge came in taking all the bits, and figuring out how to use them all in the finished product.

I had purchased the cat fabric earlier, simply because I loved the piles of kittens. That of course meant that my applique was going to be cat related.

The quilting is a variety of different styles. I was trying my hand at a few different patterns from "Quilt as Desired". Most came out ok, but there are a couple in there that I shall never do again.

As you can see, it did not take long for the quilt to be claimed by its rightful owner.

Saturday 15 August 2009

Stash Report

I haven't done one of these before, but Judy over at Patchwork Times does a weekly stash report, to track the amount of fabric coming and leaving the stash. If you're not a quilter you might not know that quilters (almost all of us) collect fabric. Sometimes a beautiful piece leaps out at you at the fabric shop - and you just have to have it, even without a project for it. In addition, every quilt you make adds to stash - at least for me. I never buy just the right amount, so extra 1/2 yards are always migrating to my stash from any quilt I make. And I swear some of it just multiplies in the closet.

I don't have a current total for my stash - I'm afraid to count what's in there now. Fabric takes up most of my closet, and all the shelves under my cutting table. Caramel tried to count the stash, but she kept falling asleep on it. However, I have made a bit of a dent in it this week.

I posted on Friday (here) that I am going to finish some of the quilts hanging around my sewing room. Great theory - but in meantime I seem to have started another 3. Oops.

Good news - the 3 new quilts are all stash quilts, which means lots of yardage used.
2 new quilts started - about 1/2 yard used so far
1 mystery quilt - 3-1/2 yards of fabric removed from stash for this one (does it count if I haven't actually cut into it yet?)

Plus, finishing quilts uses lots of fabric:
3 yards to piece the backing for a quilt
9 yards used on the backing for the one I'm quilting now

Oh, and I can't forget the bag I made for my son - 1 yard used there.

Bought 10 yards - backing for 2 quilts

17 yards out
10 yards in

Net: 7 yards 0ut

Uh Oh

Oh dear. My nephew arrives in 1 week, and the spare room is also the sewing room. Perhaps this was not the best time to start quilting a queen-size quilt.


Sometime over the next week, I have to pack up all my sewing stuff, and turn this room into a bedroom for my 10 year old nephew.

Caramel will not be impressed, as she has been enjoying a lovely bed made from my scrap pile.


The good news is, the lone star is almost half done now. Question is, do I try to finish it before Friday, or do I tackle the cleanup before the last minute? Somehow I think quilting is giong to win out.

Friday 14 August 2009

Finishing Friday

When I started quilting, I told myself that no new project would be started until I finished the previous one. Well, that was a silly idea. I soon found out that a quilter can't do 1 project at a time. There are the block of the month blocks, waiting for the next installment. A challenge quilt going on. A quilt being pieced. And of course one being quilted. And the last one you quilted waiting for binding. Right now, I have quilts in every stage of the process, from design through to complete & waiting to be hung.

I've been watching the fun over on Patchwork Times as quilters try to reduce their accumulated stash by finishing projects, creating stash quilts, and in some cases giving away fabric. It has inspired me to clean out my closet. Not so much a stash reduction (although I will have to tackle that soon, too). But a finishing festival. I will take all those UFOs (Unfinished Objects), and complete them.

I have:
- A challenge quilt from my local quilt shop - 2 years ago (needs binding)
- A quilty for the children's hospital (needs binding)
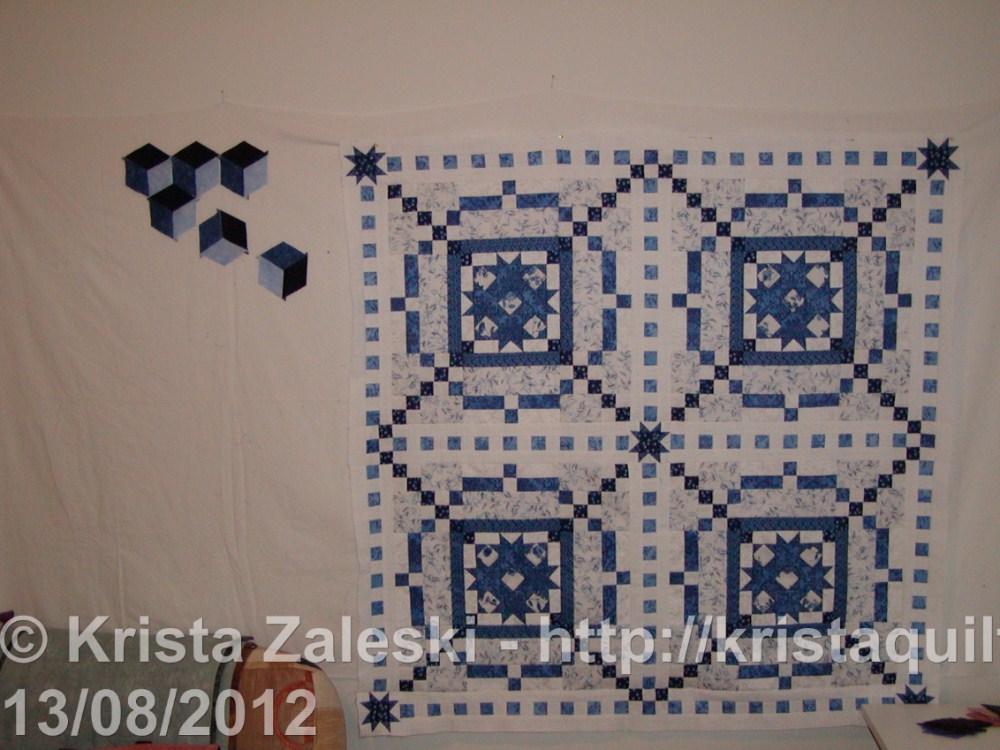
- the shop hop quilt mentioned a couple days ago (still piecing)
- queen-size lone star (needs quilting)
- A challenge quilt from my local quilt shop - 3 years ago (needs quilting)
- a picture quilt from my 2005 trip to Mexico (needs quilting)
- a queen size quilt (need to buy backing and quilt it)
- a set of 3 wall quilts (to be hung - finally labeled this week)
- a stained glass dragon (still piecing)
- a Hawaiian wall-quilt that's been on my frame for 4 years now (finish quilting)

I wonder how many I can finish, without adding more to the list? Probably not very many :)

Check back for updates on how my UFOs are coming along. Or better yet, post a link to your unfinished project list and we can work on them together, on "Finishing Fridays". If you don't have a website or blog to link, you can post your UFOs in the comments.

Thursday 13 August 2009

Ready for quilting


As expected, the kitties were more than happy to help, when I laid out my Lone Star quilt for basting. They kept the corners square, while I pinned the middle.

Unfortunately, they are not very creative cats, and when I asked for suggestions on quilting patterns, they ignored me.

I think I'll do feathers in the white sections, and a vine/leaf pattern in the dark borders. But what should I do in the star itself, and in the border stars? Any suggestions?

If you have ideas, please leave a comment for me. I need inspiration :)

Wednesday 12 August 2009

Irish Chain


This was my first bed-size (twin) quilt. I wanted to do an Irish Chain - it seemed like a fun, not too difficult, pattern to do. But I didn't want the chain to extend out to the border, as in a typical quilt. I wanted to "finish" the chain and make it a floating design. The idea was that the full chain would lay on top of the bed, and the border would drop down the sides. Seemed logical enough, so I drafted a pattern to do that. I carefully counted rows and inches, measured the bed twice, recalculated the number of rows, and set out to make the quilt.

It went together really quickly. Strip piecing is great, and I was able to put together the blocks in just a few days. A bit of care was needed to make sure all the edge blocks were constructed correctly, but even that was not too difficult. In retrospect, the pattern should have started & ended with the wider chain sections - that would have filled out towards the corners more and I think would have been a more pleasing balance overall.

Once the center was done, the border stumped me for a while. I wanted something that would blend nicely with the chain. I considered a 9-patch pattern for some time, but it wasn't quite what I wanted. Coincidentally, around the same time, my quilt guild had a seminar on seminole piecing. As soon as I saw it, I knew that this would be the border for this quilt. By turning the chain 45 degrees, the border obtained the same jagged-edge look as the rest of the chain.

Once again I measured and cut and re-measured to get the border just right, with perfect transitions in the corners. There was a lot of faith and I think a bit of luck in getting the size to work out so that every square is a full piece, and no cheating was necessary to fit.

The final step of course was quilting. Still being new at this, I stuck to straight line quilting for the main part, outlining the chain. Then, I quilted 5-pointed stars joined by some meandering around the outside of the chain, and a single star in each square.

Tuesday 11 August 2009

Creativity

By nature a quilter is likely to be creative. After all, even if you are using patterns for your quilts, you still have to come up with the right colour and fabric set to make the quilt. Some are more adventurous, and draft their own patterns. Or put blocks together in unique ways. These are planned, expected avenues of creativity. But I seem to be destined to use untapped creative skills in my quilting. No matter how carefully I plan a quilt, I often seem to be caught with the need to come up with some creative plan to fix a problem.

For example, my latest quilt. I wanted to do 4" borders. I knew I was tight on fabric, but I measured and I had 20" of fabric. Perfect - I could cut 5 strips, piece 4 border strips and be done (OK, 3.5" borders rather than 4. I can live with that). I measured that little piece of fabric 3 times - 20" every time. So, I cut it. 4", 4", 4", 4"... and 3" Huh? Now what? Looks like I'm making corner-stones for the border.

A twin quilt that I designed. Again, measured and calculated several times. Figured out exactly how many rows I needed, and carefully pieced the border to match. Then I put the finished top on the bed - and it was 10" too long. OK, I know what I did wrong here (I missed the fact that the border would sit on top of the bed at the top, and not drap down the side). Again, I had to re-think the quilt, and find a way to lose 10 inches. Luckily, the repeat on the rows (both border and top) was about 10". So removed 1 section, and the quilt was fine.

A queen size quilt. The quilt was planned, fabric bought. I would determine the border once I had the quilt complete. Bad idea! I knew exactly what fabric I wanted for the inner border - but I didn't have enough. And I couldn't find it anywhere. Oh well. Re-evaluate. Re-design. New border, in different colours.

Some might say those are just cases of poor planning. I prefer to think of it as opportunities for creativity, and a chance to prove that my engineering background has not stifled my creative juices :)

Monday 10 August 2009

What's on my design wall?


This is one of my "in progress" projects. In July some of the local quilt shops hosted a shop hop. As part of that, they each sold a kit for 1 part of a mystery quilt. The shop hop was a "Quest for a Cure" shop hop, and the mystery quilt was made from fabric from Northcott's Quest for a Cure "Cambridge Square - Blue" fabric line.

Following a 3 year tradition, I decided to participate in the mystery, and donate the resulting quilt to thequilt.com - a charity that holds an annual quilt auction and donates the proceeds to cancer support groups. I have donated a quilt every year for the past 3, and I try to use at least some fabric from Northcott's current "Quest for a Cure" collection in the quilt I donate. So, this was a perfect starting point for my next donation, and I picked up all the kits on my tour.

Unfortunately, the first 2 parts of the mystery which I attempted were both short on fabric. A rather disappointing start. I debated my options: give it up as a lost cause; purchase an additional fat quarter of each of the 6 fabrics I was (so far) short on; or try to make something from what I had. I chose option 3. I gave up on the "mystery" aspect, and pulled out all the fabric and directions for the quilt. With a bit of creativity, I rearranged the colour scheme into something that was mostly achievable with the provided fabric. I picked up one extra matching fat quarter, and continued on my way.

I now have the 4 main blocks done, seen here on my design wall. All that remains to do is the sashing and border. Nine 3-inch star blocks are part of the sashing - I guess I'm doing some more work in miniature in the near future.

Head over to Judy's blog, to see what other quilters have on their design walls.

Sunday 9 August 2009

Quilting with Cats


Anyone who quilts and also shares their home with a cat has experienced the challenges of quilting under the supervision of a four-footed friend. They insist on being part of each step in the quilting process.

My cats will carefully inspect all of my new purchases, sometimes even checking things out before they come out of the bag. It is important to use caution when moving a stack of uncut fabric - particularly if it seems heavier than expected.

When cutting fabric, the cats feel obligated to double check all measurements. They carefully inspect the placement of the ruler, and no cutting can be done until they are happy with the positioning.


Of course, they will always be happy to re-arrange any of your carefully stacked cut fabric. Just to make sure that your colour placement is truly random, I'm sure. And when piecing blocks, the cats always want to help. The problem is, they can't reach the foot pedal and the fabric at the same time in order to run the sewing machine. So they generally resign themselves to inspecting the progress as it comes out of the machine.


When laying out the quilt layers for basting, prior to quilting, there is always a cat around who is willing to test the quilt for comfort.

And the final result will be claimed immediately by any cat in the vicinity. I have called a truce at my house. The cats get their pick of the finished quilts, and I get the rest.

The kitties and I are proud to be featured in this week's "carnival of the cats".

Saturday 8 August 2009

Easy Flying Geese

Do you get tired of cutting rectangles and squares for your flying geese, putting them together and finding that the size is off by just "that much"? This technique for flying geese will guarantee you perfectly sized geese every time, with fewer corners to trim. I originally saw this technique on "Quilt in a Day".

Cut a square of fabric from each colour you want to use for your flying geese. For the interior, cut a square 1" larger than your unfinished flying geese will be. For example, if your flying geese are 3 x 1 1/2" finished (3 1/2 x 2 unfinished), then cut a square of your interior fabric 4 1/2" square. Cut a square of the background fabric 1 1/2" larger than your interior fabric square (6" square in this example).


Center the small square on top of the large one. Mark the diagonal and sew ¼” each size of the line you marked. Cut on diagonal and press towards large triangle.


Place the 2 squares right sides together, matching the top right and bottom left corners as shown. Seams will not match, but edges should. Mark diagonal and sew ¼” on each side again.


Cut on diagonal.


Clip seam at center, and press each half of seam toards background fabric.


Cut square in half, between the interior sections.


Press, and cut geese to finished size. Place the 1/4" mark of your ruler on the point, and cut the required rectangle for your finished flying geese.


These steps make 4 flying geese.


Friday 7 August 2009

Miniature Lone Star


I first saw a Lone Star quilt shortly after I started quilting. I knew that it was more complex than I felt capable of at the time, having only been quilting for a few months. But I loved the design and decided then and there that I would have one for my bed. From then on, I looked at every Lone Star quilt that I saw, imagining it in my bedroom. Would those colours work? Was the size right?


Then one day I saw a variation on the pattern, that added a second round of diamonds outside the main lone star pattern. To me, this addition made the pattern even more interesting, and I was once again determined to do this. But the thought of tackling a project that large (for a king size bed) was still daunting. Then, I learned about miniature quilts. The perfect solution - I could do a smaller version of the pattern, to make sure I could do it and test out the colour scheme I wanted.

One out of 2 isn't bad - rather than my planned colour scheme (blue), I selected some green fabric from my stash and went to work. 1/2" diamonds seemed like a good choice - I figured I'd create it and figure out how big it ended up being, rather than trying to figure out how to size the lone star pattern up-front.

Working in miniature turned out to be more difficult than expected. The initial strips were easy to sew. But pieces those into the diamonds was a challenge. Nothing would stay lined up, and there wasn't enough fabric to hold onto while trying to stitch the pieces together. I ended up using freezer paper to stabilize the pieces while stitching them together. That worked like a charm, and the quilt went together smoothly after that.

The quilting on this quilt was my first attempt at free-motion quilting on my machine. The off-white blocks and border are quilted with a feather pattern, and the diamonds are all outline quilted. This quilt is about 24" square.

See other creations, and get instructions for lots of different projects in the "Make it from scratch" carnival.

Thursday 6 August 2009

Book Review - More Quick Rotary Cutter Quilts


More Quick Rotary Cutter Quilts by Pam Bono Designs is an excellent book for both the beginner and experienced quiter. The patterns include a variety of techniques. There are many unique patterns (cats, dinosaurs, sunflowers, among others) which are made completely without the use of templates, despite their complex appearance. Detailed cutting instructions allow the construction of these blocks entirely from rotary-cut pieces, assembled without need for paper piecing, applique, or templates.

Among the unique designs and shapes, are some more familiar traditional block techniques - log cabins, irish chain, pinwheels and flying geese all find their place in the various patterns in this book. The instructions are clear, step-by-step, and easy to follow. Bright diagrams complement the descriptions, and ensure that your piecing results in the desired result.

In addition to the beautiful quilts in this book, there are many techniques described which may benefit both the new and the experienced quilter. Quick piecing of half- and quarter-square triangles; strip piecing, and chain piecing are all detailed. In addition, how to measure borders, marking your quilting pattern, and quilting techniques are all described. A nice addition to the book is the quilting suggestion provided for each quilt. For the new quilter, unsure of how to tackle the final quilting, suggested patterns and techniques are provided for each quilt, to help ensure you a complete project. No more staring at that quilt wondering how to tackle that final step. You can branch out on your own and "quilt as desired", or follow the suggestion provided if you hit a "quilter's block".

An excellent addition to any quilting library. Even after you complete the quilts you love, the tips and techniques will continue to be referenced.

Wednesday 5 August 2009

Quilt Donations

For many years I considered the idea of taking up quilting as a hobby. But, I wondered, what would I do with the quilts? There are only so many that 1 person can have, after all. And family would soon get tired of being buried under my creations.

This problem solved itself once I started quilting. There are many charities out there who are happy to receive quilts. And quilters are some of the most generous people I know. They will spend hours & hours working on a quilt, and then donate it without a qualm, and with no expectations of reward, to a needy group.

Some of my favourite quilt recipients:

thequilt.com - a charitable organization that takes donated quilts, and auctions them off. The proceeds all go to breast cancer support projects - supporting people and families dealing with cancer.

Children's hospitals - they will take small quilts (as small as 24" square) for premature babies. Also, older children who are in the hospital love to receive quilts that they can cuddle.

The Linus Project is one group who donates quilts and blankets for chilren. They have many resources on their web site, including quilt patterns.

Victoria's quilts - in both the US and Canada. They take quilt donations and distribute them to people undergoing cancer treatment.

What do you do with your quilts?

Tuesday 4 August 2009

Day One

Well, here I am. My very own blog.
This blog is going to be about my creative outlets. Mostly quilting - the creative process, the trials and tribulations, and the successes (hopefully more of those than the others). But I'll also feature my dabbling into some other creative outlets - knitting, crochet, home renovation, furniture building. A jack-of-all-trades (master of none?).

My current quilting activites are all about finishing. Finish piecing my latest quilt. Quilt the 2 previous ones. Bind 2, awaiting my attention. And label 3. The finished product is a joy. The finishing process, a reason for procrastination.

Here's one of the 2 awaiting quilting.


This one's been 4 years in the waiting stage, since I first envisioned it. Finally pieced the top this past spring. Hopefully the final quilting won't take another 4 years.