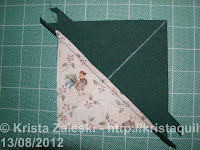
 Cut a square of fabric from each colour you want to use for your flying geese. For the interior, cut a square 1" larger than your unfinished flying geese will be. For example, if your flying geese are 3 x 1 1/2" finished (3 1/2 x 2 unfinished), then cut a square of your interior fabric 4 1/2" square. Cut a square of the background fabric 1 1/2" larger than your interior fabric square (6" square in this example).
 Center the small square on top of the large one. Mark the diagonal and sew ¼” each size of the line you marked. Cut on diagonal and press towards large triangle.
Place the 2 squares right sides together, matching the top right and bottom left corners as shown. Seams will not match, but edges should. Mark diagonal and sew ¼” on each side again.
Cut on diagonal.
Clip seam at center, and press each half of seam toards background fabric.
Cut square in half, between the interior sections.
 Press, and cut geese to finished size. Place the 1/4" mark of your ruler on the point, and cut the required rectangle for your finished flying geese.
These steps make 4 flying geese.


I was searching for this and Knew it had to be somewhere. After an hour I finally found this. Thanks so much for sharing.
ReplyDeleteAwesome! THANK YOU, THANK YOU, THANK YOU !
ReplyDeleteGod Bless